The Anatomy of a Colorway
Hello! It's been quite some time since I've put a blog post together, and I miss it so! I'm starting the Forbidden Woolery Blog anew, as when I migrated over from my Wordpress site a few years ago, my blog became quite the mess. I'll add posts back as I can get them cleaned up, but I'm going to focus mainly on new content. To start, I thought it would be fun to explore color together, and to show you what goes into creating a new colorway around here.
The most common way I create a colorway is to throw a bunch of primary colors together in a container, put some in the dypot and give it a stir, then add yarn and see what happens. If I like it, voila! A new semi-solid is born. If I don't, I think about what color would make it better, put that in the dyepot and give it a stir, and then put the yarn back in. Then I repeat as many times as necessary until the color is pretty. Some of my most favorite colorways have been created this way, actually. Bloodtracker, for one. Most definitely Poison Study. And, most recently, Nuclear Winter.
The most calculated way I create a colorway is when I use inspirational artwork as a starting point. It's a fairly new technique for me, as I only started doing this about 18 months ago when I started the Harry Potter Yarn Club in November 2015. The Wanderlust Yarn Club is also structured this way, though it's almost always centered around a photograph from somewhere in the world, as opposed to artwork. Most recently, I've been using inspirational photographs to create the new Colorway of the Month club colors. This is where I've really started experimenting with new-to-me techniques and colorways I never would've made before. It's been so much fun!
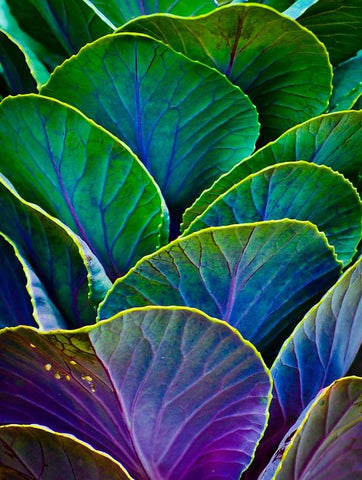
May Flowers is probably one of my most favorite colorways to date. It all started with this inspirational photograph. This beautiful image is courtesy of Christi Kraft, http://christikraftphotography.com or https://christikraftphotography.com/featured/colors-of-the-cabbage-patch-christi-kraft.html).
I think it's a cabbage of some sort, but I haven't been able to figure it out for sure. I loved the way the colors melted into each other, from pink to purple, to blue and green and, finally, just a touch of yellow around the rim of the leaf.
I dye almost exclusively from a collection of primary colors, so almost every color you see from me is custom mixed. Sometimes it's only two primaries together in varying ratios, but some colors have four or five different primaries and can also include a grey or black to create a shade of another color. Mixing different colors is one of my most favorite parts of dyeing. The possibilities are endless - I currently have about 300 different colors to choose from!
For May Flowers, I chose a pink, yellow, and blue primary, then started mixing to get as close to the colors in the photograph as I could. I write down the formula, then test the color by putting just a tiny bit in a plastic cup and sticking a paper towel in it to get an idea of what it will look like. This isn't a foolproof method by any means. I've had quite a surprise in the dyepot a number of times! Turquoise, in particular, likes to play tricks on me!
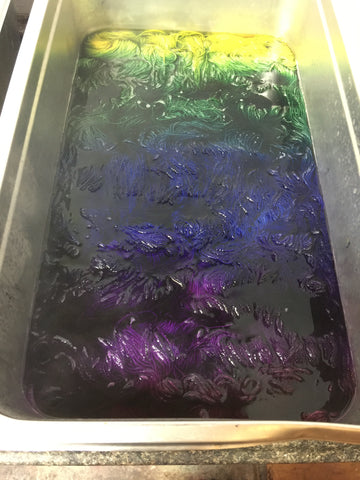
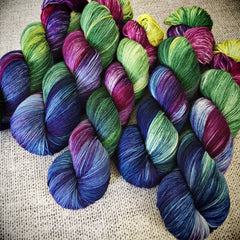
Once I had the shade of pink, purple, blue, green and yellow that I wanted, I started applying them onto the yarn in the dyepot. This is the part that's new to me. Usually, as I described above, I put the color in the pot first, and then put the yarn in. It's how I create layers and layers of complex colors. But to get more clear cut color changes, I have to put the undyed yarn in the pot and add the color on top. I started at the bottom with my pink, then added the purple, blending it into the pink so it wouldn't be too abrupt a change. Then I added the blue in the same way, then the green, and ended at the top of the pot with the yellow. When I was satisfied with the coverage and the depth of color, I left the yarn alone and let it cook until the water ran clear. Then I flipped the yarn over in the pot, and colored in as many of the white spots where the dye didn't quite hit the bottom of the dyepot. I love doing this because it creates even more melded colors in the yarn.
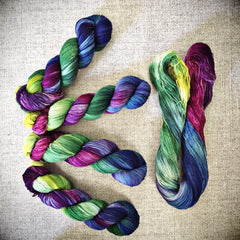
When dyed this way, each skein in the pot is a little bit different, because the dye travels in the water onto each skein at varying rates and depths. Normally my OCD would be all aflutter over this, and my eye may even start twitching. But, somehow, I actually like it! It's the beauty in hand-dyed yarn, isn't it?
Once the water runs clear and the yarn has cooled down, it then gets a rinse in warm water with a hint of lemongrass essential oil, and then goes for a spin to get the excess water out. Then it hits the drying rack to dry in the warm California sunshine. I usually leave yarn out to dry overnight, to ensure any lingering vinegar smell from the dyebath gets a chance to dissipate.
And voila! You have May Flowers. It's available for pre-order until May 31st!
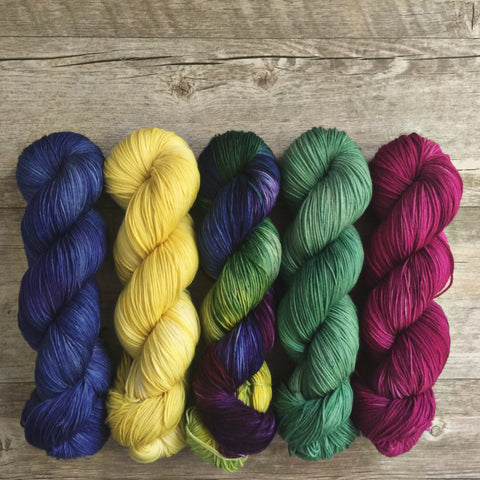
This month I took it just a bit farther and created some semi-solids using the same colors from May Flowers, so you can use them together in that multi-colored project you've been eying in your queue! From left to right in the photo below: New Moon, Daffodil, May Flowers, Succulent, Butterfly Dust. A couple of the colorways already existed (I'm looking at YOU, Butterfly Dust and New Moon), but two are brand new - Daffodil and Succulent.
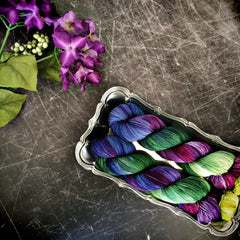
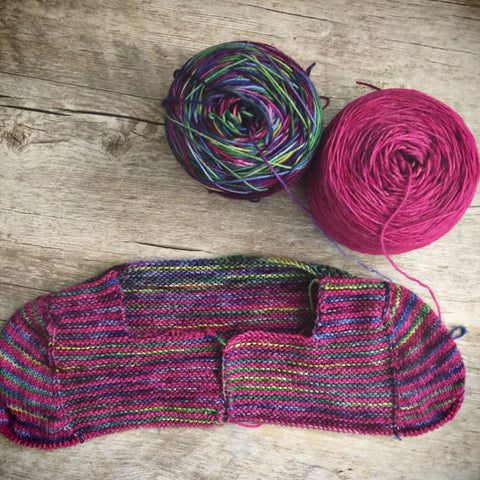
I'm using May Flowers and Butterfly Dust together in this super cute Wee Cria sweater. I'm a sucker for stripes, what can I say?
